In the last couple days we’ve moved from Sinatra to Rails as our Ruby framework. There are actually several Ruby frameworks, but we’ve focused on Sinatra (as our small introductory framework) and now Rails.
According to the intro to the Ruby on Rails Guides:
Rails is a web application development framework written in the Ruby language. It is designed to make programming web applications easier by making assumptions about what every developer needs to get started. It allows you to write less code while accomplishing more than many other languages and frameworks. Experienced Rails developers also report that it makes web application development more fun.
“Easier”, “assumptions”, “less code”, “more fun”. How does Rails accomplish this? It mostly comes down to valuing convention over congifuration, equipping the programmer with a conventional setup rather than requiring him to configure it every time. One way Rails enables this is through generators.
rails generate
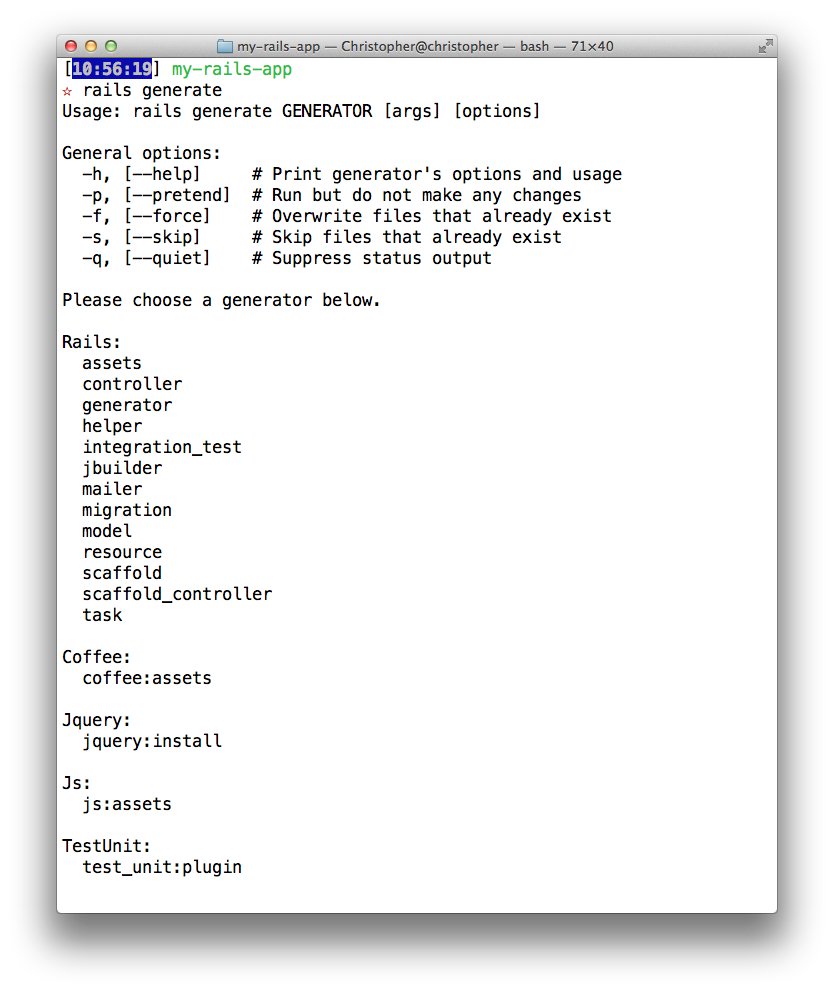
Using rails generate (or the aliased rails g command) gives developers access to a number of generators, which “will save you a large amount of time by writing boilerplate code, code that is necessary for the app to work.” The list of Rails generators are depicted below (and can be accessed by simply running rails g), specifically in the “Rails” section of the options.
 My main focus (for now) is on the following five generators, since they’re the ones I’ve already used in building basic MVC apps: controller, migration, model, resource, and scaffold.
 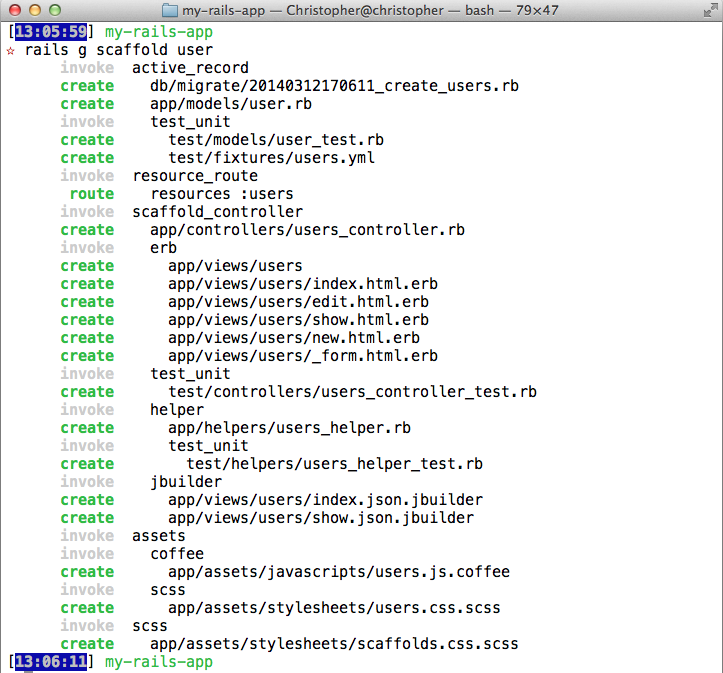 I want to sort out exactly what happens when each generator command is run. Quite simply, there’s a big diference between running
 rails g migration [migration name] and rails g scaffold [resource name], as you can tell by the images to the right. There’s obviously a big difference there, between the broad strokes of rails g scaffold and the surgical addition of a single migration file with rails g migration. That difference boils down to a high-level generator vs. a low-level one.
Why does this matter though?
As Avi told us, “we always want to generate the least amount of code possible.” He encouraged us to “use the lowest level generator you can to get all your functionality” because, the programmer should dictate the direction of the application, not be driven by the Rails framework.
rails g command |
Number of files created |
| Migration | 1 |
| Model | 4 |
| Controller | 7 |
| Resource | 12 |
| Scaffold | 19 |
It’s easy enough to play with the different Rails generators to see what they do, but—in the interest of minimizing the number of files and lines of code we create—this table lays out some really basic data.
A couple final comments
Each generator basically stubs out a given thing. For example, rails g controller stubs out a new controller and its view. Some of the other generators:
assetsstubs out placeholders for new assets (like JavaScript and CSS) in the app/assets directory.generatorstubs out a new generator, which can speed up workflow by creating, for example, an initializer generator.scaffoldscaffolds an entire resource, from model and migration to controller and views, along with a full test suite.taskstubs out a new Rake task.
All that aside, it’s always really easy to figure it out—rails g [generator] will list the usage, options, description, and example of a given generator.